Setup Multiplayer Quake on a Retro Handheld Against a Player on a Computer
Rise of the Retro Handheld
Retro handhelds are all the rage these days with impressive portable consoles like the Retroid Pocket and Anbernic RG35XX lineups selling extremely well. The main draw for many buyers is that these devices can emulate a wide variety of their favorite retro (and in some cases not so retro) consoles and games in a handheld form factor. Not only that, but many come with sleek or nostalgic designs and for the most part don’t break the bank when compared to more mainstream handhelds like the Nintendo Switch or Valve Steamdeck.
But besides emulation, a somewhat lesser discussed feature is their ability to play direct ports of computer games like Quake and Half-Life. After all, many of these devices are running a version of Linux under the hood, and this makes it possible to run a Linux version of these games natively without running the game through an emulation layer. This comes with a number of advantages in terms of performance. These games can often run at a high frame rate with virtually no stuttering. They typically have no graphical artifacts and look and feel very smooth. It's also a ton of fun to play them on a handheld. 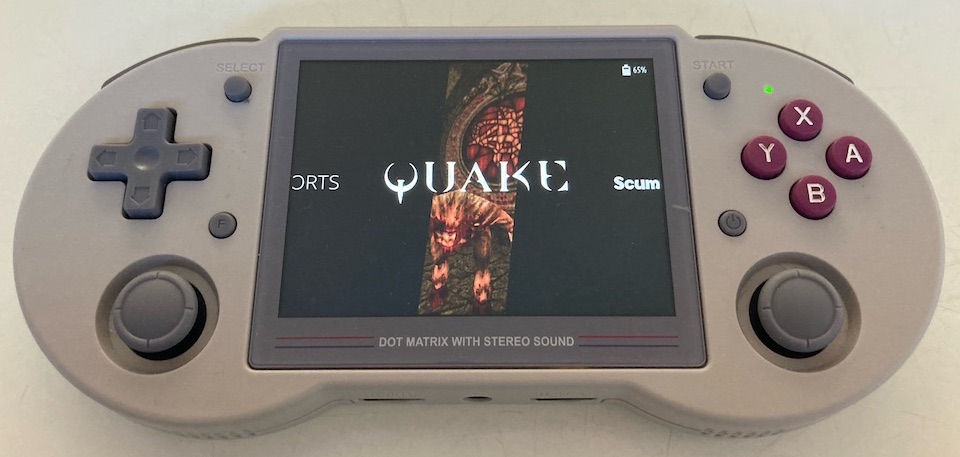
In this tutorial we’ll be installing Quake on one of my favorite Linux-based retro handhelds, the Anbernic RG353PS, and demonstrating that you can engage in crossplay where one player is playing Quake on the RG353PS while the other plays on a conventional PC/computer.
Setting up Quake on Your Computer
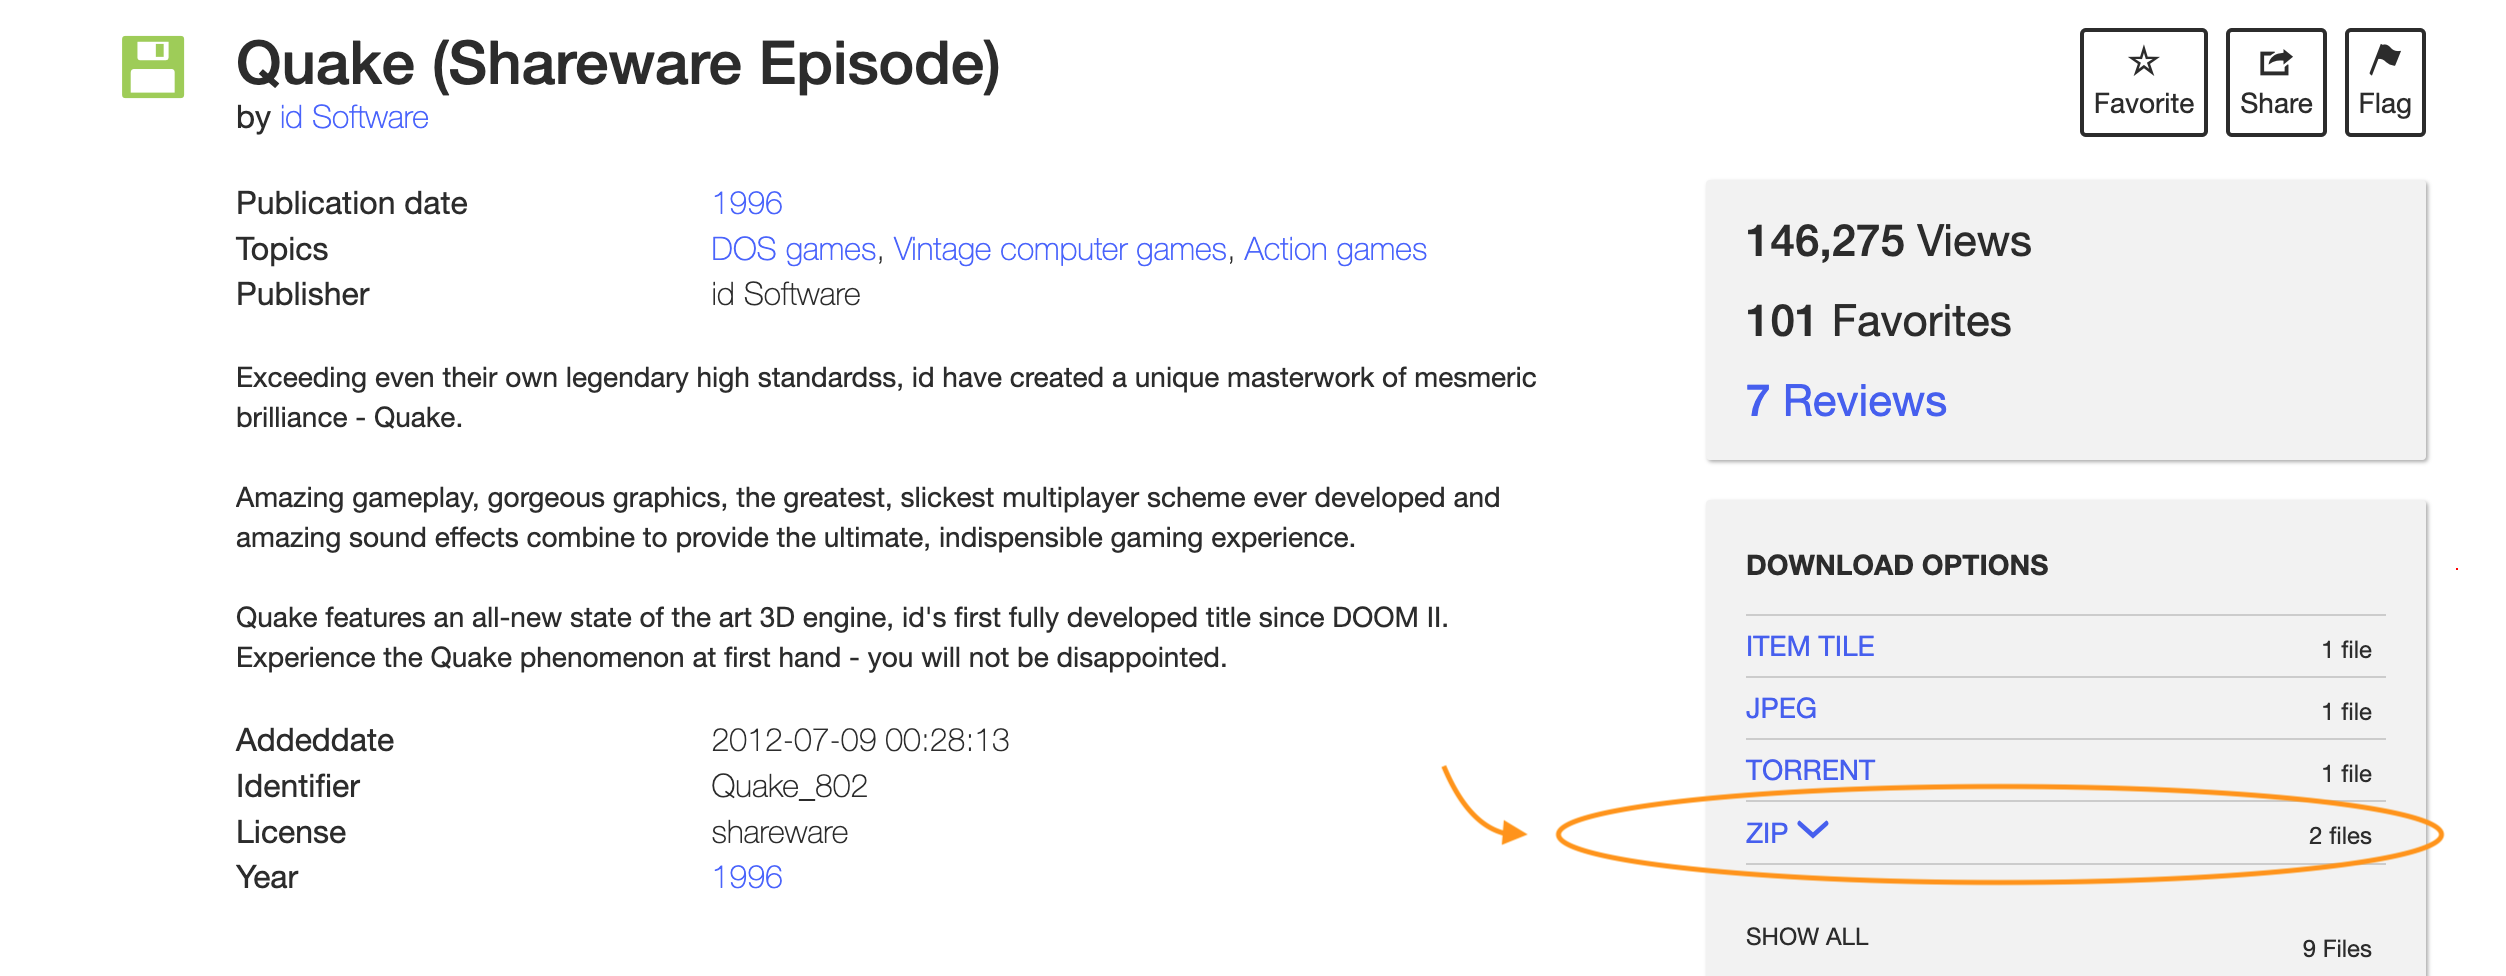
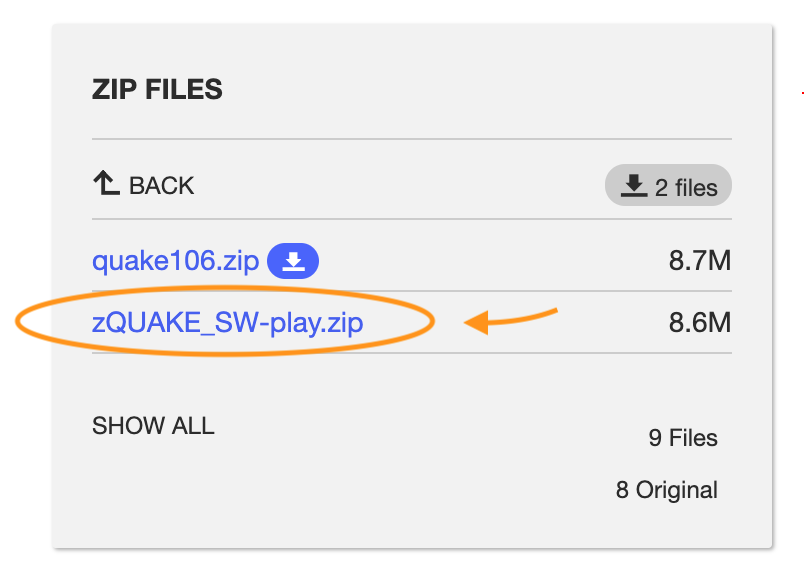
Playing Quake on PC against Quake running on a handheld is nothing new. Years ago I used to do this with a homebrew port of Quake running on the Nintendo DS (QuakeDS) against a PC running Windows XP (Video: Quake Nintendo DS vs PC Crossplay). We'll create a similar setup between the Anbernic RG353PS and a Macbook Air running vkQuake. Note that this will likely also work for other Linux-based retro handhelds and on computers running Windows or Linux rather than MacOS. You can install vkQuake from source as I've done using the instructions from the vkQuake GitHub repo. Other versions of Quake like WinQuake, GLQuake or Quakespasm should also work but I haven't verified this. If you don't already have the game data for Quake, you can grab the shareware version here:
Just click “ZIP” on the the right side and download the “zQUAKE_SW-play.zip” file:
Once downloaded, extract it and copy the contents of the “ID1” folder of the download to the “ID1” or “id1” folder of your version of Quake (vkQuake/WinQuake/Quakespasm). If you compiled vkQuake from source, this will be in the “<PATH_TO_VKQUAKE>/build/id1” directory. Once “PAK0.PAK” is inside this directory, verify that you can run Quake on your PC/computer by double clicking the executable, or in the case of vkQuake by running
in Terminal from the 'build' directory.

Setting up Quake on the Anbernic RG353PS
I’ve found that the most well rounded OS for running a mix of both ports and emulators on the RG353PS is UnofficialOS, which is what we’ll be using for this tutorial. To install it see their instructions on the GitHub releases page.
Caution: If you are currently using stock firmware, I highly recommend you back up your stock firmware before overwriting the SD card with UnofficialOS. Alternatively you could use a seperate SD card for UnofficialOS. The stock firmware is well optimized for emulation even though overall I personally prefer UnofficialOS because of it's flexibility.
I'm using the RG353P image which will work for the RG353PS. The RG353P and images for other retro handhelds are available on the UnofficialOS releases page under 'Assets'. For the RG353PS, UnofficialOS should be installed to the Micro SD from slot TF1 on the device. TF2 is used for ROMs.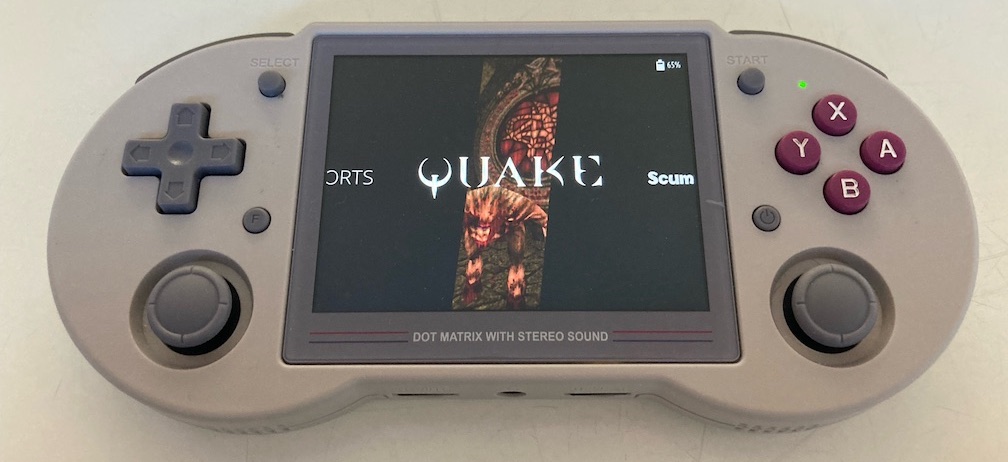
UnofficialOS comes with a preinstalled Quake section in Emulation Station which is what we'll be using. Once you have UnofficialOS on your RG353PS working and booting up correctly, installing Quake on your RG353PS is very straightforward:
- Power down your RG353PS and take out your ROMs Micro SD card (from slot TF2 on the RG353PS)
- Download the shareware version of Quake from the link in the previous section if you don’t already have a copy.
- Open up your ROMs Micro SD card on your computer with a Micro SD USB reader.
- Copy the "ID1" folder from your copy of Quake over to the "quake/" folder on the Micro SD. Rename it to all lowercase "id1" (and same with "pak0.pak").
- Safely Eject your Micro SD card from your computer and put it back in your RG353PS (again, slot TF2)
Alternatively, or if using a seperate OS, you can install Quake through PortMaster. However, at least on my system, Quake installed through PortMaster was unable to save and load single player games correctly, including when using other operating systems like ArkOS.
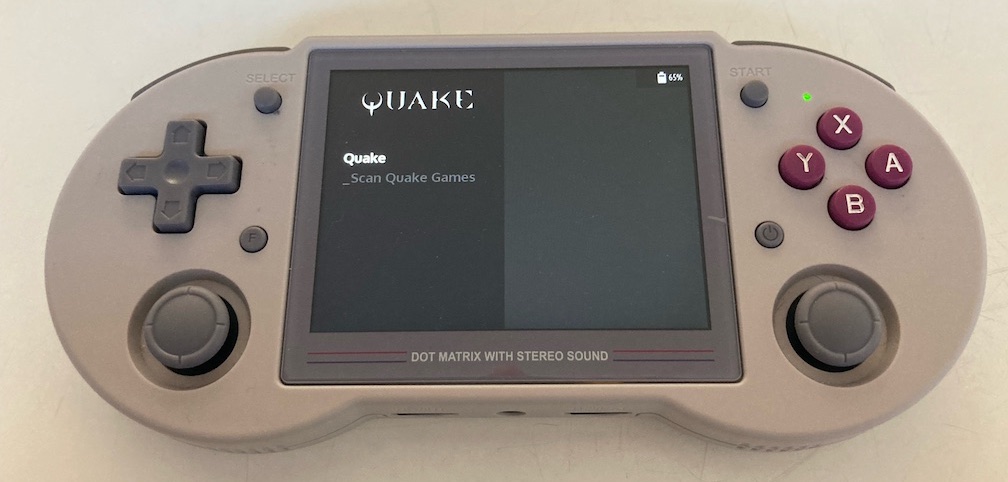
That should be it! Now power on your RG353PS and navigate to the Quake Menu. You should now see "Quake" when you press "A" on that menu. If not you may have to run the "_Scan Quake Games" script first. Press "A" again with "Quake" selected to run the game and verify that it works:
Optionally you can edit the following settings to get Quake to look and play it’s best on the RG353PS:
- While Quake is running, hold "Select" and press "X". This will take you into the RetroArch menu
- Go down and select "Core Options"
- Set "Internal resolution (restart)" to 640x480
- Go back to the previous menu and verify that it says "640x480". I would also set Invert Y Axis to "ON" (it’s inverted in the game already so inverting here sets it to normal!) Then hold "Start" and press "Select" twice to exit Quake. This is needed for the resolution to take effect. The native resolution for the RG353PS is 640x480, and this should look really good on it once you complete the next couple of steps
- Launch Quake again, then press "Start" to open the game menu
- Go to options > video. Turn up gamma so that the slider is in about the same spot as the default "Screen Size" slider (about 75%). This is up to you but this looked good for me.
- Then set "Smooth Animation" and "Smooth Movement" to "ON"
- That should be it, verify that it looks good to you. You can start a single player new game and see how it looks and feels. The one thing to do when you open up a new play session: Go to Options > Input > Customize Controls > and set attack to one of the R triggers. Of course this is up to you, but this felt more natural to me than the default "Y" button.
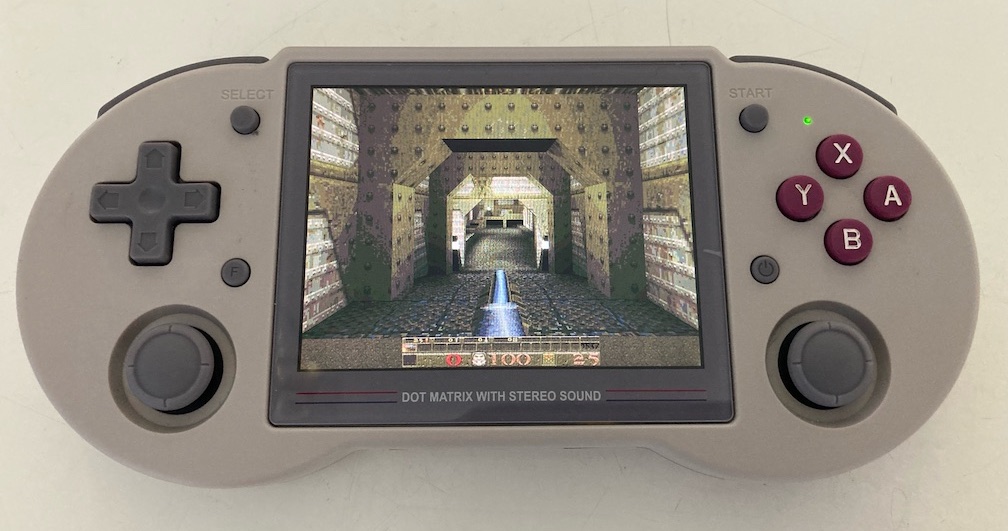
Quake should now be ready to go on your RG353PS. Verify that you can start and play a single player game with your current settings.
With Quake running on your computer and your retro handheld, we can now setup a multiplayer game between them.
Running Multiplayer Crossplay Between RG353PS and Computer
Once you have Quake running on both your PC and RG353PS you can follow these steps to play a multiplayer game between them:
- Make sure both your computer and RG353PS are connected to the same WiFi network. Also, make sure your computer's firewall allows incoming connections (at least from the Quake application), otherwise they won't connect!
- On your RG353PS: Launch Quake and go to Multiplayer > New Game. Write down your IP address (something like 192.168…) and port number (26000 in Quake by default).
- Then select "OK" and "BEGIN GAME"
- You should now be in a multiplayer game all by yourself on your RG353PS
- Now on your computer: launch your version of Quake (vkQuake/WinQuake/Quakespasm etc.). Go to Multiplayer > Join Game
- Still on your computer, in the Join Game At: section, type in the <RG353PS_IP_ADDRESS>:<RG353PS_PORT_NUMBER> that you wrote down, something like “192.168.1.86:26000” but a slightly different IP for you.
- Hit enter and vkQuake on your computer will try to connect to connect to TyrQuake on your RG353PS. This may take a few tries/opening and closing Quake. You may need to disable your vpn on your computer if you’re using one. But after a few tries you should both be in the multiplayer game and should be able to see the other player.
If everything went smoothly, both players will now be in the multiplyer game and should be able to find the other player:
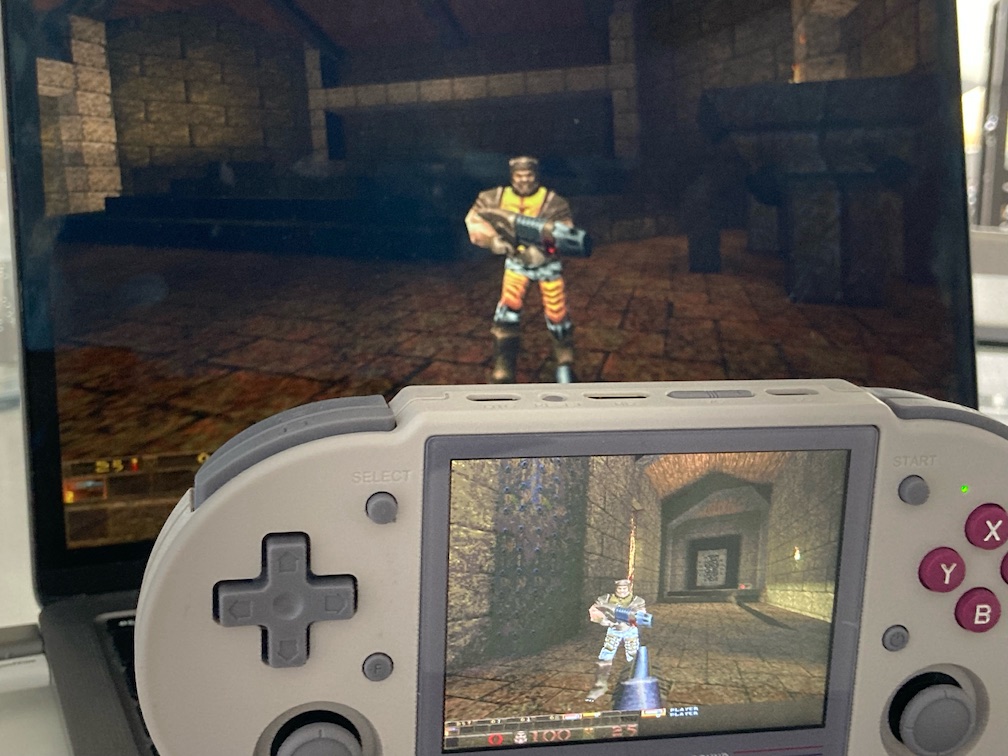
And that's it! You are now playing Quake multiplayer between a desktop/laptop computer and your Anbernic RG353PS. It can take a little trial and error, but you can often get multiplayer Quake to work between players using very different hardware because it is open source and widely ported. You can learn more about related topics in our tutorials section. Have fun!