Setting up a Shared Folder Between a Linux Virtual Machine and MacOS Host with VirtualBox
Intro
If you've done any programming or ethical hacking, there's a good chance you have used a Virtual Machine (VM) before. Sometimes I use them to create a clean, contained environment for reverse engineering. But other times it is simply to use compilers and toolchains that aren't available on my host machine's operating system. When the latter is the case, I often need to move files from VM to host and vice versa.
In this tutorial, we will be creating a shared folder between a host machine running MacOS and an Ubuntu 22.04 virtual machine created with VirtualBox. The process will be very similar for other host operating systems as well as other Linux-based VM's. Let’s get started!
Setting up the Shared Folder
First create a new folder on your host computer that you want to act as a shared folder between host and VM. We’ll set it up as a folder on the virtual machine as well in just a moment. I’ve created a folder named “SharedFolderExample” on my Mac (the host machine). To follow along, create your host folder now.
You will need VirtualBox Guest Additions installed on your VM in order to create a shared folder. There's a good chance it was installed with your Ubuntu VM, but if not install it now.
Next, with your VM running, pause it by going to Machine > Pause in VirtualBox: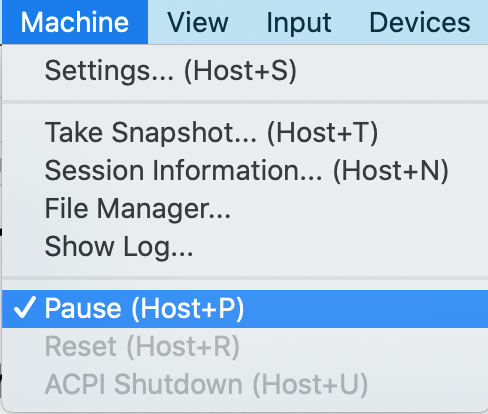
Then in the same dropdown click on Machine > Settings…. You should see something like the following: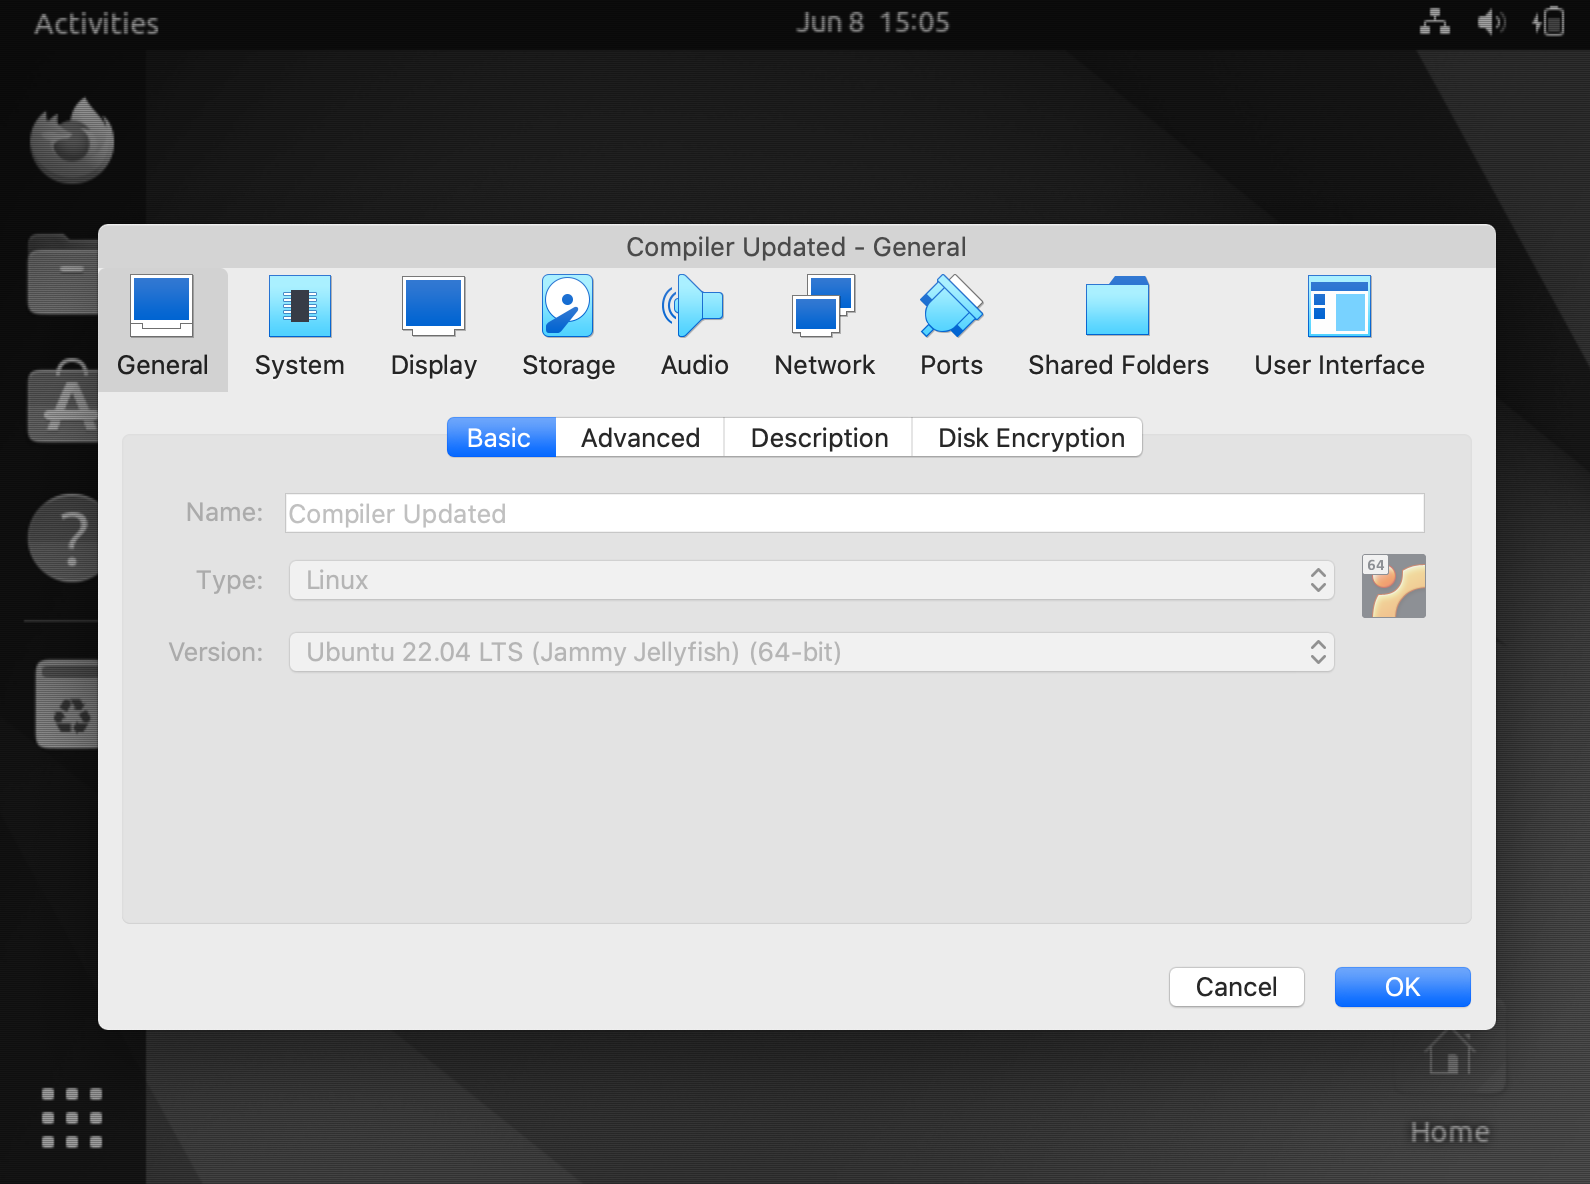
Now click on Shared Folders. To create a new shared folder, click on the icon with the folder and + sign. This will open a smaller menu with the fields “Folder Path”, “Folder Name”, and “Mount Point”.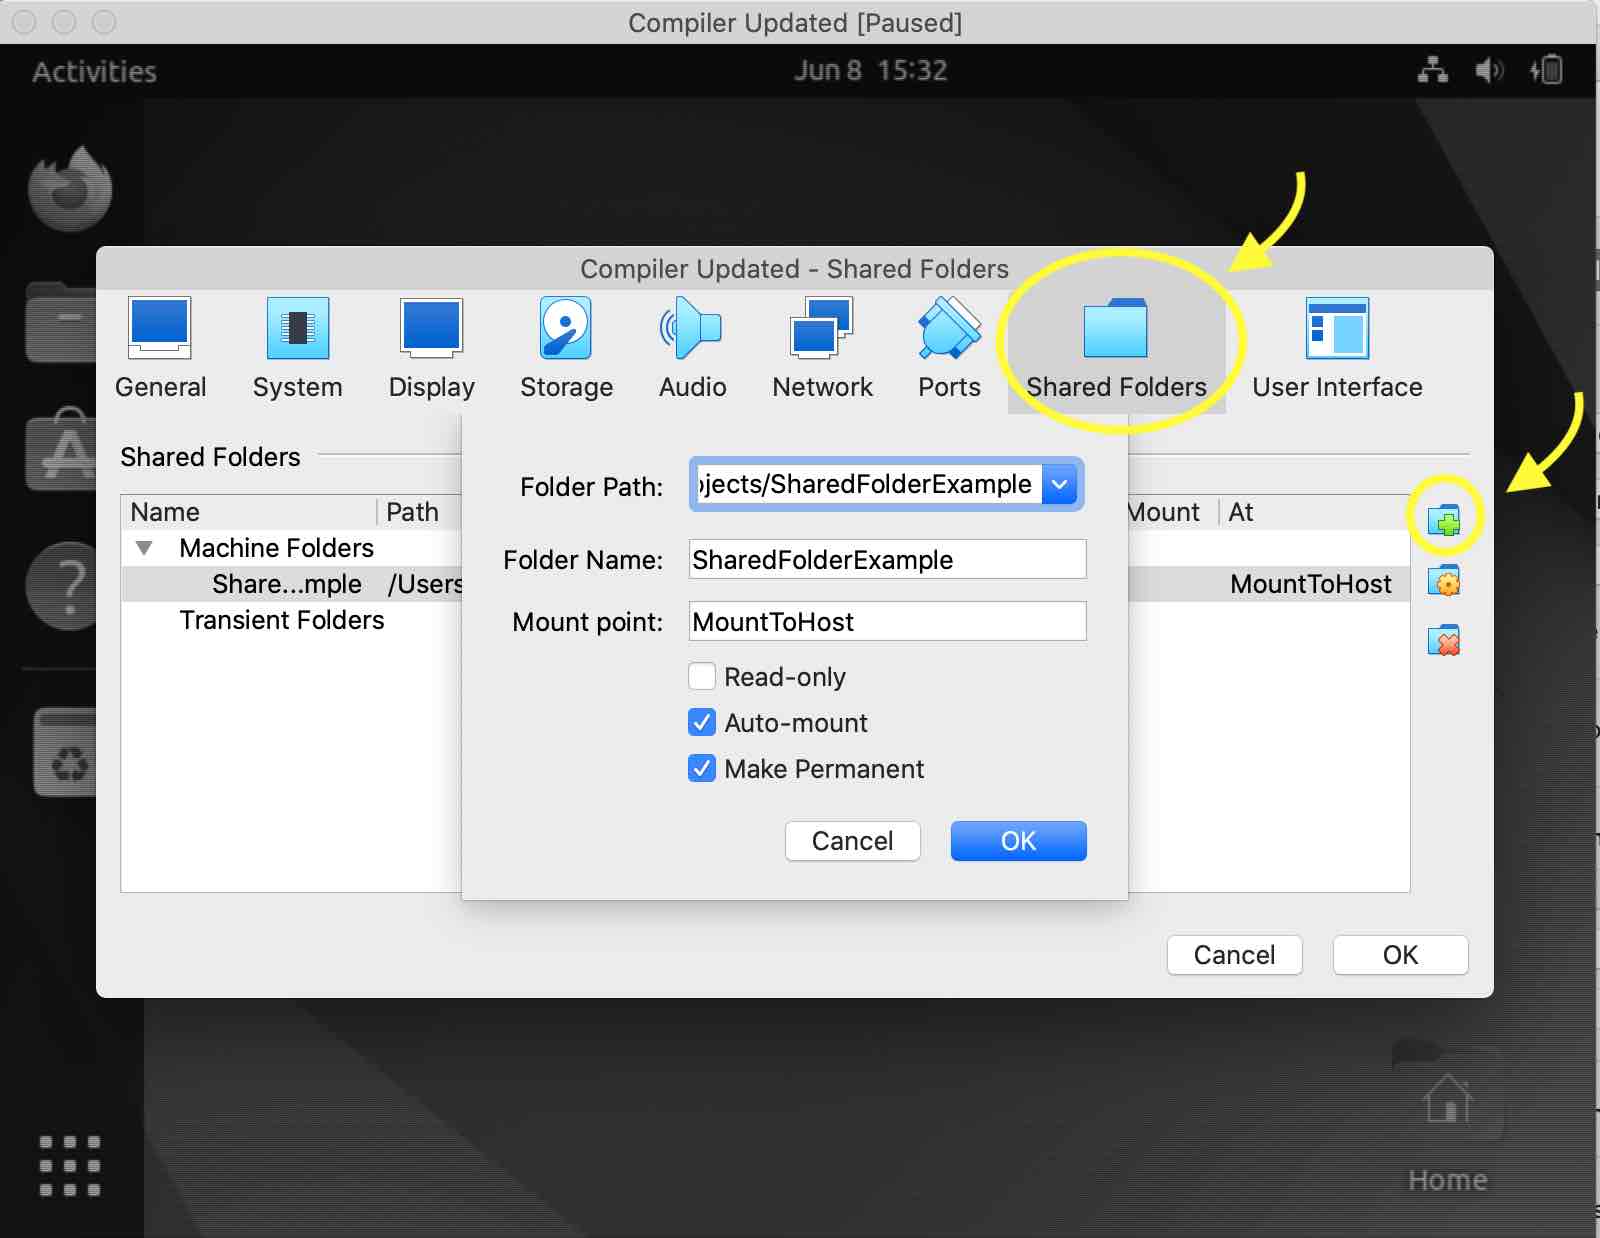
In “Folder Path” click the drop down and navigate to the folder on your host computer that you created (“SharedFolderExample”). Select “Auto-mount” and “Make Permanent”. In “Mount point” type the name you want to give to the shared directory on your VM. I’ve given mine the name “MountToHost” (we haven’t created this folder on the VM yet). When you place files from your VM into “MountToHost” they will be accessible to your host computer in its “SharedFolderExample” directory (or whatever you named yours). After you've filled out these fields, press “OK”.
Now unpause your Ubuntu VM. In the VM, create the directory “MountToHost”. You can do this by opening Terminal in the Ubuntu VM and typing:
Now ls to make sure it shows up correctly:
You should see something like this:

Now connect MountToHost from your VM to SharedFolderExample on your host machine by entering the following command into Terminal (still in the VM):
You may be asked to enter the password for your VM if you have one:

If everything went smoothly, you should now be able to move files into “MountToHost” on your VM and then access them from “SharedFolderExample” on your host machine. Similarly, files placed in “SharedFolderExample” on your host machine should also be accessable from “MountToHost” on your VM.
Testing the Shared Folder
To test that it works, create a blank txt file from within your VM in “MountToHost” and see if it is available in “SharedFolderExample” on your host machine. Still in the VM in terminal, type:
$ sudo touch test.txt
On your host machine, navigate to “SharedFolderExample” and verify test.txt is in there:

Looks good! If you edit this file, the changes should show up in both locations. Any file you place in “MountToHost” on the VM will now be available in “SharedFolderExample” on your host computer and vice versa. Keep in mind that if you are using a VM thinking it will shield your host computer from potential threats if the VM gets infected, this is one avenue malicious software running on your VM could get to your host computer. In other words, you should probably avoid running questionable software on your VM from a shared folder like this.
That does it for this one! Check out our other tutorials on related topics here.